Pages

Minggu, 07 Juni 2009

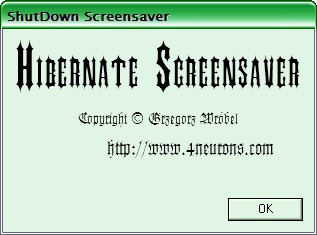
Hibernate Screensaver

Hibernate screensaver will hibernate your computer after 2 minutes from startup. It can be very useful if you want to save energy or just have your computer turn off for when it is not being used (silence and no energy consumption). It displays number of seconds left to hibernation. You can terminate the countdown by deactivating screensaver.

Hibernate Screensaver


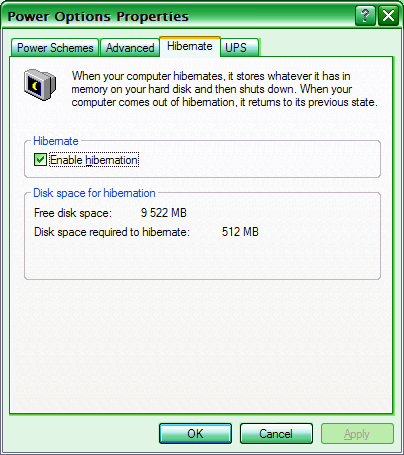
Note: you will need to have hibernation option enabled on the system, otherwise Hibernate Screensaver will only switch your computer into standby mode.

How to enable hibernation?

1) Go to the Control Panel and click "Power Options" icon:
Power Options
2) Select "Hibernate" tab and check "Enable hibernation" checkbox:

Enable Hibernation

3) Click "ok" button.

Rocketdock application launcher

Some time ago I've stumbled upon an interesting post by a Rocketdock user who was using one of our product - Analogue Vista Clock to "anchor" the Rocketdock launcher to the desktop.

There is a problem inherent to all desktop applications. Anyone who attempts to write a desktop extension that is supposed to stay attached to the desktop, will eventually encounter it. All such application stay anchored to the pulpit only if they have "always on top" style set. As soon as that style is turned off pressing the "Show desktop" icon will hide the desktop application!

See for yourself! Download and install Rocketdock from here, then click on "Settings" options and change "Layering" from "Always on top" to "Normal" or "Always on bottom", as shown on screenshot below:

rocketdock settings


When you click "Show desktop" link from the Quick Launch, the dock will disappear along with all other windows.


According to latest research only few wizards and dark mages from 4Neurons corporation possessed the arcane knowledge required to deal with this problem. Analogue Vista Clock is an example of desktop application that can address this issue:

Analogue Vista Clock

See for yourself. Download (click on an image above) and install Analogue Vista Clock. Right click on its tray icon and uncheck "On top" option, or select "Settings" from its tray icon menu and uncheck "Always on top of other applications" checkbox, as shown on the screenshot below:

Analogue Vista Clock Settings

If you click "Show desktop" link from the Quick Launch you will see that all windows disappear, but the clock stays on the desktop. But now comes the best part...

If you run both Rocketdock launcher and Analogue Vista Clock and set Rocketdock's "Layering" to "Normal" and uncheck "Always on top of other applications" in Analogue Vista Clock settings, then Analogue Vista Clock will anchor the Rocketdock launcher to the desktop! If you click "Show desktop" now you will see that not only Analogue Vista Clock stays on the desktop, but Rocketdock is there too.

Windows Vista boot logo screen

Change Windows Vista boot logo screen:

Note, this information is for advanced users only!

First let's make sure you have applied some of the tips from Windows Vista tips page (tip 13 and 12 and eventually tip 9 if you didn't copy eldo.exe to the folder that is already present in the %PATH% variable). If you didn't apply those tips, you can do it now:
1) Download the eldo utility.
2) Create "myutils" folder on the C: drive.
3) Extract eldo.zip to myutils directory.
4) Run regedit.exit and find "Path" value inside "HKEY_LOCAL_MACHINE\SYSTEM\CurrentControlSet\Control\Session Manager\Environment" key. Add ";C:\myutils" at the end of "Path" value.
5) Download Command.reg and add it to the registry (double click on it).

If it's done you need to download and install one more tool called Vista Boot Logo Generator.
You also need to prepare two images for your logo, one in resolution 1024x768 and second in resolution 800x600. You need to save them as 24bpp bmp files (you can do it with MS Paint).
If the above is ready do the following:
1) Open Windows Explorer and go to "C:\Windows\System32" directory.
2) Find directory named "en-US", right click on it and choose "Command Prompt".
3) In the command prompt type: "eldo takeown /f winload.exe.mui" and press Enter. (a console window should appear informing about SUCCESS in taking ownership of the file, just press Enter to close it).
4) Now, to make backup of "winload.exe.mui" file type in the command prompt: "eldo copy winload.exe.mui winload.exe.mui.backup" and press Enter. You can close the "Command Prompt" window now.
5) In Window Explorer find that "en-US" directory and browse into it, find the "winload.exe.mui" file there , right click on it and select "Properties".
6) Select "Security" tab and press "Edit" button. Select "Administrators" group and check "Full Control" check box under "Allow" row and click "Ok" button.
7) Now we are ready to replace the boot images in the file. Go to "Programs\Vista Boot Logo Generator" in the "Start Menu" and right click on it. Select "Run as administrator" from the context menu
8) In the program select correct logo images (800x600 and 1024x768 bmp files) and then save (File->Save Boot Screen File As...) the file as "winload.exe.mui" in the "C:\Windows\System32\en-US" directory (overwrite old file).
9) Now you need to perform one final step: Go to the Control Panel (make sure you are in the "Classic View" mode) and double click "Administrative Tools". Now double click "System Configuration" shortcut. Select "Boot" tab and check "No GUI boot" check box. Press "Ok" button.

You can reboot your Windows Vista now and if you have done everything right, you can admire your new Windows Vista boot logo screen. :)

Windows XP versus Windows Vista

Windows XP versus Windows Vista

Windows XP vs Windows Vista
Short comparison of Windows XP versus Windows Vista:

The comparison has been made on optimally tweaked machines just after system boot, with no applications running:

Windows XP applications Vista applications


Let's take a look at processes. At first glance it looks like Vista has less processes, but...

Windows XP processes Windows Vista processes

... but Windows Vista by default shows only processes from current user. You can click "Show processes from all users" button to see all processes in the system - there are naturally more of them than on XP, which results in more resources being used by the OS.

Windows vista has also an additional "Services" tab. There is really a lot of services running on Vista.

Actually Windows Vista can eat up few percent of your CPU power even when "doing nothing". It also consumes significantly more system memory (see below).

Windows Vista services


Memory usage by Windows Vista is about 4 times larger than it is in case of Windows XP! This monster consumes such significant amount of RAM by itself it might become a serious issue when running resource demanding applications, even on machines with large ammount of RAM. Compare for yourself:

Windows XP memory usage Windows Vista memory usage


Operating systems compared:

Windows XP Windows Vista


Bonus - Windows XP registry editor vs Windows Vista registry editor:

Windows XP regedit Windows Vista regedit

Windows Vista Tips and Tricks

Windows Vista Tips and Tricks:

Tip nr 1: Bring icons back to Desktop
Right click on the Desktop, choose "Personalize" from the context menu. Click "Change desktop icons" link (on the left). Now you can choose which icons you want on the desktop.

Icons - Windows Vista

Tip nr 2: Classic Start Menu
If you'd rather use classic Start Menu just right click on the taskbar, choose "Properties" from the context menu. Choose "Start Menu" tab, Select"Classic Start menu" radio button and press "Ok" button.


Tip nr 3: Disable Remote Control of your computer!
If you don't plan to remotely control your computer it is recommended to disable this option for security reasons.

To do it right click on "Computer" and select "Properties" (or go to the Control Panel, choose "Classic View" and double click "System"). Click "Remote Settings" link on the left. In the dialog box uncheck "Allow Remote Assistance connections to this computer" check box and select "Don't allow connections to this computer" radio button. Click "Ok" button.


Tip nr 4: Download full codec pack
Windows vista lacks many codecs older version of Windows had. These legacy codecs are necessary to play any old media files (mostly video) and Media Player 11 won't be able to find them. You can download the full K Lite Codec Pack here.


Tip nr 5: Change your boot logo screen!
If you find current Windows Vista boot logo screen boring you can enable the hidden "Aurora" boot screen. To do it go to the control Panel (use classic view), double click "Administrative Tools" and click "System Configuration" shortcut. Select "Boot" tab and check "No GUI boot" check box. If you restart your computer you'll see the hidden "Aurora" boot logo.

Aurora

It is possible to change the boot logo screen to any image. You can find detailed description here (notice this is for advanced users only): Changing Windows Vista boot logo.


Tip nr 6: Disable Restore Points
If you don't want to use "Restore Points" you can disable it. It unnecessarily occupies system resources, decrease performance of your system and cause fragmentation of your hard-drive disk space.

Right click on "Computer" and select "Properties" (or double click "System" in the Control Panel while in Classic View). Click "System protection" link on the left. Uncheck checkboxes for all "Available Disks". Click "Ok" button.


Tip nr 7: Disable unnecessary services
Go to Control Panel and double click "Administrative Tools" (in Classic View mode), double click "Services". Here you can disable unnecessary services like "Windows Error Reporting service". Find this service on the list, double click on it. Click "Stop" button to stop the service, then change it's "Startup type" to "Disabled" and press "Ok" button.

Other services you can safely disable:
- Offline Files
- Tablet PC Input Service
- Teminal Services
- Windows Search
- Fax

Note: the information below is for advanced users only, who know what they are doing:
If you don't want to use the useless "Security Center" - find it on the list of services, stop the service and change it's startup type to "Disabled" or "Manual".
If you don't want to use "Automatic Updates" and have already set "Never check for updates" in the "Windows Update" settings you can change this service startup type to "Manual". Just find "Automatic Updates" service, stop it and change it's startup type to "Manual".
If you want to disable "Windows Defender" running in the background - you can find "Windows Defender" service and set it's startup type to "Manual" (also make sure that it is removed from autostart list in the Registry - run regedit.exe and go to HKEY_LOCAL_MACHINE->Software->Microsoft->Windows->Current Version->Run key and remove "Windows Defender" value).


Tip nr 8: Get some useful system tools
You can download some useful tools that will allow you to monitor/configure your operating system.
Probably the most essential tools are:
- Process Explorer - an advanced process explorer for Windows. Download Process Explorer.
- Process Monitor - tool for monitoring changes to files and registry. Download Process Monitor.
- Autoruns - tool for checking and modifying your autoruns settings. Download Autoruns.
- TcpView - utility for monitoring open tcp and udp connections. Download Tcpview.


Tip nr 9: "autoexec" path
In Windows Vista there is truly no autoexec.bat file. If you can find it - it is only a dummy file that is not executed at all. So if you want to add additional paths to %PATH% variable you can't do it using autoexec.bat anymore. Instead you should do it via Windows Registry. Run regedit.exe and go to: "HKEY_LOCAL_MACHINE\SYSTEM\CurrentControlSet\Control\Session Manager\Environment". There is a "Path" variable there and you can add your additional path locations there.


Tip nr 10: Disable auto defragmenting
Right click on disk C: in Windows Explorer, Select "Tools" tab and click "Defragment Now..." button. Uncheck "Run on a schedule" check box and press "Ok" button.


Tip nr 11: Disable UAC
It is not recommended to do it for security reasons, however if you really can't live with UAC you can disable it. UAC stands for User Account Control and it's presence is manifested mainly trough that annoying "An known/unknown program is trying to access your computer. Are you sure you want to run this program?" messages. To disable it and have everything running at maximum privileges do the following: Go to the Control Panel (switch to classic view if necessary) and double click "User Accounts". Click "Turn User Account Control on or off" link. Uncheck "Use User Account Control (UAC) to help protect your computer" check box. Click "Ok" button. Restart your computer.


Tip nr 12: "Command prompt" shortcut

Command Prompt context menu Command Prompt window

Whenever you need to to something from the command prompt in a selected directory you can add a special shortcut entitled "Command Prompt" to the context menu of each folder. To do it you need to create a .reg file with following content and then merge it with the registry (double click on it):

Windows Registry Editor Version 5.00

[HKEY_CLASSES_ROOT\Directory\shell\text console]
@="Command &Prompt"

[HKEY_CLASSES_ROOT\Directory\shell\text console\command]
@="cmd.exe /k cd %1"

Or you can download this file here.


Tip nr 13: eldo
Whenever you are working in the console and need to run some console command elevated you'll discover that Windows Vista does not offer you any comfortable way to do it. The only way is to launch an elevated console process, go to the directory when you were last workin in the non-elevated console and perform the command that needs administrative rights.
To avoid it you can download eldo.exe and simply use "eldo" command to perform any elevated task from non-elevated console. In other words "eldo" is Windows Vista equivalent of unix "sudo" command.

You can download eldo and eldoGUI (GUI equivalent of eldo for elevating GUI apps without showing console - if you ever needed such version) below. Place these files in a directory included within %PATH% variable.

Download eldo command here.


Tip nr 14: Disable excessive Windows features
You can disable some of the following Windows features (unless you are using any of them):
Go to the Control Panel and double click on "Program Features" (in classic view). Click on "Turn Windows features on or off" in the left pane. Deselect:
- Indexing Service
- Remote Differential Compression
- Tablet PC Optional Components
- Windows Fax & Scan
- Windows DFS Replication Service
Click "Ok" button.


Tip nr 15: Disable Superfetch
Windows Vista uses completely new approach to system memory. It treats all your RAM as system cache and tries to populate it as soon as you log into Windows. Although it is supposed to improve overall perfomance, the result might be the opposite (excessive loading data into the cache decreases performance when loading unncesessary data takes place).
To disable Supefetch and use memory like in Windows XP simply stop and disable "Superfetch" Windows service. (See tip nr 7 for details how to disable services).
vista tips and triks

Disk cleanup

One of the most neglected tasks in Windows Vista (or any other Windows version for that matter) is running Disk Cleanup. As the name implies, Disk Cleanup cleans out your Temporary Files folder and all other trash (not to be confused with the Recycle Bin) that’s scattered throughout your system.

deletetemporaryfiles

To run Disk Cleanup, you can go to your Start Menu > Program Files > Accessories > System Tools > Disk Cleanup. You then select the drive you want to clean up - which is usually your boot drive, or C: - and then check the sections you want cleared of digital debris. Another way is to type ‘cleanmgr’ into your Run box in the Start Menu to take you directly to Disk Cleanup.

After this you can enjoy a faster boot and general speed as well.

Windows 7.0 ??? Why so soon?

win70The leakage of screen shots of the much rumored upcoming replacement for Windows 6.0 or Vista is raising speculation on Microsoft’s drive to re-gain ground due to their many commercial mistakes from the ill-performance of Vista which failed to get more than enough support from the many skeptical XP users. Called too nosy, too complicated and more, Vista has angered a lot of users that most had to revert back to XP which has reached ideal stability that was the status of Win98 when they pulled the plug when XP was introduced. They have been criticized a lot for the move but the resistance was short lived when they worked hard enough to get it downright stable enough to satisfy their customers. Read the rest of this entry »

Make menu loads faster

If you’re using Windows Vista on your PC, you’re bound to get frustrated from time to time about how slow the menus seem to be. It’s a good thing then,that we were able to find an article on how to speed this thing up!

A simple registry tweak will allow you to speed up the menu. First load the registry editor by launching regedit from the Run menu (Press WINDOWS KEY + R to access the run menu).

Then, navigate to HKEY_CURRENT_USER\Control Panel\Desktop in the side panel, then right click on MenuShowDelay and select Modify.

Now, enter the menu delay time in milliseconds (1 is near instant, do not enter 0!) and press OK

Once you have restarted your menus will slide at near instant speeds. The default setting is 400 should you wish to restore the default menu setting.

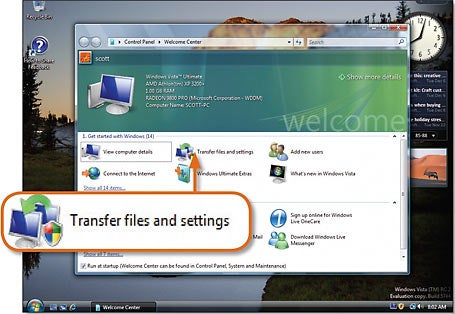
Vista’s Easy Transfer


Image Source: images.pcworld.com

There is a cool feature in Microsoft’s latest operating system that i truly like . It provides a safe and easy way to transfer files and other important documents to another computer. It works very well. Just also be reminded not to expect to much from this service. Because first of all, it was created to at least alleviate our situation when we need transfer data from one device to another. Its a simple but effective tool for this kind of task. It works good most especially when the two PCs are connected and that the other PC also is running on Windows Vista. Usb cable will do, actually. But if you know how to connect it through a network, that’s much better. Easy transfer can only pick up data files and some Windows registry entries, nothing so complicated. So don’t expect to work miracles for you.

Backup Windows Vista

Image Source: media.bestofmicro.com

The Backup and Restore Center which is packaged with Windows Vista is an excellent tool, which allows you to backup and restore critical files or image of your OS.

How to launch the utility “Back up and Restore Center”.

  • Press the Start buttom
  • Type Backup
  • Select Backup and Restore Center

How to Back Up files
Click Backup Files and follow the prompt or directions that pops up on the screen. Select the directories and the specific files you want to backup. Then look for a prefered place to store the backed up files. Ideally it is best to put it on an external hard drive or a DVD.

How to Restore Files
Simply launch the Backup and Restore Center application and select Restore Files. Insert the DVD or external hard drive and look for the back up file and simply follow the prompt which will appear on the screen.

Back Up the Registry
Sometimes when you tweak your PC, you unknowingly change registry values. This sometimes causes failure of functionalities within your operating system. So we need to back up the registry as well.

Keyboard Shortcut for the Menu Bar


Image Source:mydigitallife.info

Getting used to a new operating system is, but there are tips and tricks so you can learn it, making transition a lot easier. We use the Menu Bar all the time. This is the bar across the top of most program windows that includes items like; File, Edit, View, Tools, Insert, Help, etc. In Windows Vista, the menu bar is not visible in most windows. I find this very frustrating because I am always changing some settings using those menus.
If you are using Vista and you need to make a change or two, and taht is or was available in the menu bar, you can make the menu bar temporarily visible in Vista just by pressing the “Alt” key on your keyboard.

Try it now, following these steps:

  1. Open a window by clicking on the “Start” orb and click on “Documents” in the right hand side of the menu
  2. Your “Documents” window will open. Notice there is no menu bar visible.
  3. Press the “Alt” key on your keyboard just once. The Menu bar will appear near the top of the window. It will stay there.
  4. Press the “Alt” key again to hide the Menu bar.

So there you have it. One more mystery of the Unknown… SOLVED!

Stopping Program Crashes


Image Source: www.beans.seartipy.com
The first thing you will want to do is to run your Windows update. Download and install all updates. If you disabled the automatic option for some basis it is a good idea to leave it enabled, this way you stay on top of all your updates routinely. Next you will want to do general maintenance on your computer. Begin by running the cleanup program on your hard drive.

After that make sure you do not have a virus or spyware running in the background. Some spyware infections can use take over a lot of your computer’s memory, leaving little for operating the programs you want to use. You can turn off Vistas eye candy and other options that you really don’t need. You can always turn them back on later on if they do not resolve your problem. While they look pleasant they exploit a lot of memory and other resources. Go to my computer, right-click and select properties. Go to the advanced tab and under preforming settings you can select adjust for best performance.

The most common reason for program crashes is because of registry errors. Like most people you have probably tried to install older programs on Vista there were not compatible and then uninstalled them. The problem is that most uninstall programs do not do a complete job. They leave behind registry keys and entries. Over time your registry becomes full or corrupted. Improper shutdowns, viruses, spyware, and corrupt software will also harm your registry resulting in program crashes.

Firefox and IE7 Speed Tweaks

Let’s tweak Firefox first…

On the Firefox Address bar: type about:config
this is very easy takes about 5 minutes

Search for these values :

“network.http.pipelining” — set the value to true
“network.http.proxy.pipelining”
set the value to true
“network.http.pipelining.maxrequests”
set the value to 8
“plugin.expose_full_path”
set the value to true
“nglayout.initialpaint.delay”set the value to 0
“network.http.max-connections”
set the value to 48
“network.http.max-connections-per-server”
set the value to 16
“network.http.max-persistent-connections-per-proxy”
set the value to 16
“network.http.max-persistent-connections-per-server”set the value to 8
“browser.cache.memory.capacity”set the value to 65536

Restart Firefox, and its done.

Next stop : Speeding up Internet Explorer 7

I rarely use IE7… but oh well since were talking about speeding both browser I’ll just have to make an exception… for the sake of tweaking and optimizing galore…

Prepare to fire up your Registry Editor.

Click Start -> run type ‘regedit’ or Windows key + R then type ‘regedit’

Speed up IE7 page loading especially on multiple tabs and look for this key

[HKEY_CURRENT_USER\Software\Microsoft\Windows\CurrentVersion\Internet Settings]
“MaxConnectionsPerServer”= Changed it to dword:00000010
“MaxConnectionsPer1_0Server”=Changed it to dword:0000010

Exit ‘regedit’… no need to restart just Log off then login again… now prepare to enjoy fast browser with little effort on your part. hehehe!!!!and without using third party softwares…

Vista Start Menu

Looking through the Windows Start menu could give you a headache if you have dozens of applications installed on your computer and you go from one arrow to the next looking for that elusive program. Vista Start Menu makes it easier to find what you need. Users have been impressed with the interface, which is better than the regular Windows menu. Program shortcuts don’t move around. There is keyboard support and zoom, resizing and tabs, power buttons and scrolling. Plus, new programs are highlighted so you find where they are. The Pro version has additional menu customization and one-click launch, which reminds you of the days when Windows was actually simple.

Free 3D modeling software

daz.jpeg blender.jpeg

You can get almost anything free online these days, including these impressive 3D software that give an added dimension to your screen or artwork.

DAZ Studio 2.2.2.15 from DAZ 3D is more stable than its previous releases. It features Lip-Sync to integrate sound files from Mimic. It also provides the new Smoothing Angle and the added your favorite tools to the morph panel.

Blender Foundation’s open-source Blender 2.46 gives you all the tools you need to become a 3D animator. Like DAZ Studio above, this is a bug-fixing release, with added features such as cloth and fur simulation, shading, glossy reflection and refraction, soft shadows, improved rendering features, amongst others.

Screens from download.com

vista Komputer term

A keyboard shortcut to get to Windows Vista Task Manager

If you have Windows Vista and have tried pressing Ctrl + Alt + Delete keys, to bring up the task manager, it will not work. You will be logged out first and then given a menu of choices. Of course you can choose to open the windows vista task manger from there, however why go to all that trouble.

In Windows XP it was easy to get to the task manger by just pressing Ctrl Alt and Delete keys on the keyboard. You would be taken straight to the task manager, and not logged out to get there. In Windows Vista you can now press Ctrl + Shift + Esc keys to get directly to task manager.

I would love to know why they have changed it?

Windows Vista Task Manager

Windows Vista Task Manager

Add or remove icons from your Windows Vista

notification area

The Windows notification area is the most frequently used part of the desktop taskbar. It keeps you up to date with whats going on on your computer by animated icons that occassionally poup with messages for you. A great example is when there are Windows updates ready for your computer or if your laptop battery is running low.

The notification area also holds the volume control icon, the time, and any other program icons that are enabled to show there. You can change the settings for a program icon to Hide when inactive, Always hide, or Always show. This allows you to remove annoying icons and just keep the important ones.
What are the most common icons that appear in the Windows Vista notification area?

  • Time
  • Volume
  • Windows update icon
  • Network connections icon
  • Bluetooth icon
  • Laptop Power icon
  • Windows Live Messenger

How to add or remove icons in the notification area in Windows Vista

  1. Go to the start menu icon in the left corner
  2. Right click on it to bring a menu
  3. Choose properties from the menu
  4. Go to the Notification Area Tab
  5. Click on customize to change the settings for each icon that shows up in the notification area

Watch this video tutorial to see more details..

Change the Windows Vista start menu to a classic XP style

If you can’t handle the new Windows Vista start menu, and you cannot seem to find what you want, then don’t pannic. You have two choices for a start menu in Windows Vista. If you have Windows Vista you would have seen the default start menu. It seems a little confusing after dealing with Windows XP

Classic Windows Vista menu

Classic Windows Vista menu

Here’s how to change the Windows Vista start menu to a classic menu.

  • Go to the Windows Icon in the left bottom corner and right click on it.
  • A menu will appear. Choose properties from the menu.

Change the start menu

  • The taskbar and start menu properties will appear.
  • Go to the start menu tab.
  • Put a check next to Classic Start Menu.
  • Then press apply for the menu to change.
Start menu properties

Start menu properties

Put the run box link back in Your Windows Vista Start menu

Having used Windows Xp for what seems like forever, adapting to the changes in Windows Vista was a big task for me. Even though I am very familar with Windows XP and Vista seemed to be similar, it didn’t turn out to be afterall.

One of the features that was left out by default in Windows Vista was the good old run box link in the start menu. It was a complete delema for about 5 minutes in total. I supose its means nothing to the average computer user, however to the computer geek, freek, addicted person, it does.

Watch this video tutorial on how to put back the run box link in your Windows Vista Start menu.

Here is how to put a run command shortcut on your start menu in Windows Vista:

  1. Right click on a blank space in your taskbar

  2. Go to the start menu tab

  3. Press on the customize button

  4. Then scroll down near the bottom and tick the box next to run command

  5. Press OK and then apply

Free Windows Vista Wallpapers to download that are vistalicious!

I found these fantastic wallpapers on the internet and it was love at first sight. There must be millions of free wallpapers out there to download, however it takes time to find a vistalicious one. You can’t just put any old wallpaper onto a flash computer running Windows Vista!

I have been searching for a few decent wallpapers for a change of scenery and surprisingly enough I have found about 20 that pass the test. I will be adding them to the site soon.

They are not exactly just for Windows Vista, they will also work for Windows XP, unfortunately. LOL.

Here’s how to grab these Windows wallpapers for yourself:

  1. Click on one of the wallpapers above
  2. When the bigger size wallpaper comes up, right click on it
  3. A menu will appear, choose save picture as
  4. Now browse your computer to find a spot to save the file
  5. That’s it

Windows Vista

How to turn off the user account control (UAC) in Windows Vista

You know that annoying message that keeps coming up asking you to cancel or allow your actions, well this is the user account control in Windows Vista. I really do not understand why it is there, because you can still press allow and stuff your computer up very easily. I just think its an annoying message and I always turn it off in Windows Vista.

All you have to do is tick or untick a box and the UAC (user account conrol will be turned off.

Watch this easy video tutorial showing how to turn off the UAC.


How to setup a Windows Mail email account in Windows Vista

If your Email provider did not give you a setup disc you can setup a Windows Mail account manually as long as you have the settings available;

What you need to setup an account in Windows Mail:

  1. You will need the Windows Mail program that comes free with Windows Vista
  2. You will need to know your email address
  3. Your password
  4. Your incoming mail server
  5. Your outgoing mail server
  6. Sometimes you will need to know a port number to use. The default is 25, however some mail servers need to use 80.

Watch this video below to see how to add an email account to Windows Mail.

Add people to your contact list in the Windows Mail Address Book

Adding people to your contact list in Windows Mail is pretty much exactly like Outlook Express in Windows XP. However there is an Extra Windows Mail tip for you.

Here are a few different ways to add a contact to your address book in Windows Mail.

Add a sender to your contact list

  1. When your emails have come in and you see them in the inbox. Before opening them you can select it by making it blue.
  2. Then right click and choose add sender to the address book.
  3. Now you will be taken to the address book to edit your new contact.

Add all email addresses that came with the email

  1. Open an email that has more than one recipient. (Your friend sent it to you and three others)
  2. Then go to the tools menu.
  3. Choose add sender to address book.
  4. Then you will have a choice to choose to add the sender, everyone on the list, or choose the addresses individually. For example: my uncle sent me an email but he had sent it to my two cousins as well. Therefore in that list were my cousins email addresses.

Also watch this video tutorial on how to add a contact to your address book in Windows mail.


Change mouse clicking from double click to single click in Windows Vista

You don’t always have to double click on icons, files, and folders to open them. You can customize your mouseclick to suit your needs. I personally like to dispose of the double clicking and choose single click with underlining. So when you move your mouse over a filename or folder it will become underlined and makes it very clear that you are about to click on it.

How to change mouse clicking from double click to single click in Windows Vista.

  1. Go to the start menu and choose computer
  2. From the menu, choose tools. If there is no menu you can press the ALT key for them to appear. Also see Show the old menu with file, edit, tools, and view in Windows Vista.
  3. Then choose Folder Options from the menu.
  4. On the general tab undering the heading click items as follows, choose single-click to open an item.
  5. Then choose which single click option you want to use.
  6. Then press apply and ok.

Watch this video tutorial to see an example of the different types of single click options in Windows Vista.

Start Windows Vista Flip3D quickly without clicking a

shortcut

In the old days of Windows XP we had Windows flip, which switched through open applications on your computer when you pressed the WinKEY and the TAB key. Now in Windows VIsta you can still do this, however now it also has Windows Vista 3D flip.

What is the Windows Vista Flip3D?

Well if you have any version above Windows Vista Basic you will probably know what Windows Flip 3D is. It is a fantastic way to browse through your open applications on Windows Vista. The thumnail windows glide past you as you scroll through them to make your choice of which program to open. If you are into bells, whistles and cool tweaks, Windows Flip 3D is for you.

Now because this is all such a smooth process, it is annoying when you have to actually go and click on a shortcut icon on your taskbar to get Windows Vista Flip 3D to start. This is why you need a free program called Windows Vista Flip 3D activator. You simply download it, install it, and set it to open Windows Vista Flip 3D as soon as you go to a particular corner of the screen.

If you go to http://notj.net/flip3d/windows_vista_flip_3d_activator.html you can see more information on this program. Also see the video tutorial below to see Windows Flip 3D Activator in action.


To see how to disable Windows Vista Flip 3D see this article http://www.winvistaclub.com/t191.html

How to restore a Flip 3D shortcut icon to your Vista desktop tasbar

Just say you accidentally delete the Windows Vista Flip 3D icon and then realise that you cannot find the program to create another icon. Well there is no need to panic as it is easily fixed. There are two detailed steps to restore your Flip 3D icon to your desktop or quick launch toolbar on the taskbar.

Step 1 : Create a desktop shortcut that opens the Windows Vista Flip 3D application

  1. Right click on the blank area on your desktop
  2. Choose New from the menu
  3. Then choose shortcut
  4. Now copy this RunDll32 DwmApi #105 and paste it into the area that says Type the location of the item
  5. Press next. Then Type in a name for your shortcut. (Flip 3D)
  6. Press Finish. That’s it.

Now when you double press on this icon it will start Flip 3D.

Step 2 : Change the icon to a proper Windows Vista Flip 3D icon

  1. Right click on the icon that you just created
  2. Choose properties from the menu
  3. Now the shortcut properties will appear and you need to be on the shortcut tab
  4. Then press the Change icon button
  5. Press browse to find the right icon for Flip 3D
  6. The file you want is in C:/Windows/System32 folder and is called imageres.dll
  7. Once you have selected this file press open
  8. Now you will have lots of icons to choose from. The Flip 3D icon will be in there somewhere.

Please watch the video tutorial below to see more details.

Download free gadgets for your Windows Vista gadget sidebar

Windows Vista has a sidebar that can be enabled that holds cool gadgets to help you through the day. It could be a notepad to write notes, a clock, the local weather, and so much more. If you haven’t enabled the Windows Vista sidebar and added gadgets to it, seriously, you should give it a go.
How to enable the Windows Vista Sidebar Gadgets:

  1. Got to the start menu at the bottom left corner and choose control panel
  2. Then double click on the Windows Sidebar Properties icon.
  3. The box below will appear.
  4. Tick the box Start Sidebar when Windows starts
  5. Then tick the box Sidebar is always on top of other windows
  6. Press Apply and then OK.. It should immediately appear on the desktop.

How to download or install more gadgets:

To install or browse through all Vista gadgets that are available you can go to http://gallery.microsoft.com/vista/SideBar.aspx. If you have a genuine Windows Vista program then they are yours to download free.

Also when you have the Sidebar installed on your desktop there is a plus sign at the top. Double click on this to open the window pictured below. You can click on any of the gadgets here to install them to your desktop. If you want to download more click on get more gadgets online.

Windows Vista Free Gadgets

Windows Vista Free Gadgets

Get something like Aero Flip 3D for Windows Xp and Vista Basic

Aero Flip 3D in Windows Vista is very cool if you have it, however if you do not, there is a free program called Rocketdock that gives you the same convienience and feel. The screenshot below does not give it justice because you cannot see the icons glide out when you mouse over them.

If you have Windows XP or Windows Vista Home Basic you can download this program and almost pretend that you have cool graphics like Vista Aero Flip 3D. This is a really cool program that resembles the dock that is used on a mac computer.

Rocketdock screenshot - icon browser

Rocketdock screenshot - icon browser

In the settings you can move the Rocketdock to the top, right, left, or bottom of the screen. You can also drag icons onto it and remove them by right clicking on the icon and choosing to delete the item. There are also loads of themes to choose from.

I have tested this program on a Windows Vista Home Premium and Windows XP Professional and it worked flawlessly. Oh yeah… Did I mention it was free! And there are no nagging popups or spyware, the developers politely ask for a donation if you like the program.

Rocketdock features

  • Easily drag and drop new icons onto the dock
  • Fully customize themes and settings
  • Real time previews are on the dock (movies are still playing and watchable)
  • Runs great on slower computers

Download Rocketdock from http://rocketdock.com/downloadis

Please note that Windows XP x64 Edition, Windows Vista 64-bit Editions, and alternate shells are not supported.

Use Windows Vista Aero Flip 3D to glide through open programs

In the old days of Windows XP we had Windows flip, which switched through open applications on your computer when you pressed the WINKEY and the TAB key. Now in Windows Vista you can still do this, however now it has Windows Vista flip 3D. This is one of the new features that comes with Windows Vista Aero.

Window Vista 3D Flip animates the entire idea of flipping through open applications. The open programs actually glide past you on your desktop in a cascading style, moving as you move the scroll wheel on your mouse. Then, conveniently you can click on any window in the line to open it fully to work on. You do not even have to click on the open application that is at the front of the line.

To use Windows Vista Aero Flip 3D you will need:

  • Windows Vista Home Premium or higher. (not included with Home Basic)
  • A compatible video card that is capable of running Aero Glass.
  • A relatively fast computer for a seamless glide of open windows.

The great thing is that if you have a video playing or a game running, it will continue to do so while lined up behind other programs. The video keeps playing. A good way to test this is to put yourself on your webcam and wave to yourlsef when using aero flip 3D. You will be able to see yourslef moving even though the size of the window has been reduced.

Windows Vista Aero Flip 3D

Windows Vista Aero Flip 3D

Show the old menu with file, edit, tools, and view in Windows Vista.

Old habbits die hard! And this is exactly why we need to bring back the old style classic menu when using Windows Vista Explorer. There are menu items that are hiding from us. I am talking about the file, edit, tools, view, and help menu that was on every explorer window in XP.

This classic menu enables you to change important settings such as folder options, which in itself has at least 30 settings alone.

Here’s how to show the classic old style menu (file, edit, tools, and view)

  1. Go to the start menu and choose documents from the menu
  2. Now press the Alt key on the keyboard
  3. The classic menu will appear
  4. If you press Alt again it will disappear

This is just a temporary fix because the classic menu will not stay there. Next time you go to m computer or documents, you will have to press Alt again.

To get the classic menu to stay in Windows Vista Explorer you need to:

  1. Open computer or documents from the start menu.
  2. Press the Alt key to get the classic menu to appear.
  3. Now got to the tools menu and choose Folder Options.
  4. On the general tab under the heading tasks put a check next to Use Windows Classic Folders.

Watch this video tutorial below to see more details.

Microsoft Word 2007 Tips

Microsoft Word 2007 Tips

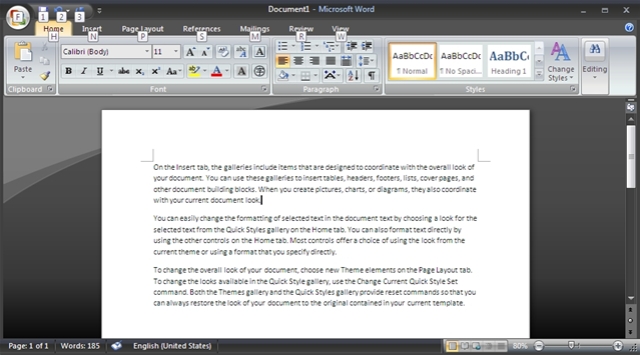
If you are using Microsoft word 2007 you will notice that it is considerably different to the old word 2003. For starters the entire top menu does not look like the old one, and the menu is now called a ribbon menu. Each tab in Word 2007 is now called a ribbon. So for example, if you choose the Home ribbon you will see all the menu items that fall under this ribbon. Because of the huge difference between Word 2003 and Word 2007, we now need a whole new entire set of Word Tips and tricks to suit 2007.

Show or hide your desktop icons in Windows Vista

Sometimes when you have a really nice wallpaper on your desktop, having desktop icons on top of it just ruins the picture. Therefore I like to remove or hide the desktop icons so you can see the whole wallpaper on your screen with no ugly icons.

Watch this video to see how to show or hide your desktop icons.


Free jigsaw puzzle game for Windows Vista!

Hi guys,

I just downloaded and tried Everyday Jigsaw for Windows Vista and it is very addictive. If you love doing jigsaws then this is a free game to download. It lets you make your own jigsaw with your own pictures. There are also different jigsaws to do everyday. You will need an internet connection to get the new jigsaws everyday.

If you want to download extra jigsaws to do it will cost money. Here is a jigsaw I made with this free program.

Everday jigsaw

Everday jigsaw

This is what it looked like when I started to try and do the jigsaw…Could I have picked a harder picture???

jigsaw pieces
jigsaw pieces

I started to do a jigsaw and totally got addicted. It is a fantastic simply game that you can download for free and works great with Windows Vista.

Scroll down to find the button that says download everyday jigsaw.

What wireless networks are available to connect to in Vista?

There is nothing worse than wanting to connect to a wireless network but not knowing if there are any available. Its ok if you have the wireless network connection icon in the notification area, however if you do not, you would even know if there was a network available. In fact there may be more than one network for you to choose from.

In Windows Vista, to see what wireless networks are available to connect to is very easy. And yes, this is probably easier than Windows XP.

How to find a wireless network to connect to?

The first way is to simply double click on the network connections icon in the notification area in the task bar. Then choose to go to the network and sharing center. When you have opened the Network and sharing center there is a link in the left sidebar that says connect to a network.

The second way is what you have to do if there is no wireless network connections icon in the notification area. Still simple though.

  1. Go to the start menu. Choose control panel.
  2. Double click on the Network and Sharing center icon.
  3. click on the link in the left sidebar that says connect to a network.

Watch this video to see more details about how to find a wireless network to connect to.

Also note that even though you see a network on the list, you may not be able to connect to it. It may require a WEP key (password) to connect to the wireless network. In fact it could have a number of security measures to pass before connecting.

There is no group policy editor in some versions of Windows Vista!

If you have been using Windows Vista for a while now you would have realised that there is no gpedit.msc available!!! The only versions that have group policy are Windows Vista Business, Windows Vista Professional ,Windows Vista Enterprise, Windows Vista Ultimate, Windows Server “Longhorn”.

Unfortunely if you have Windows Vista home basic or Windows Vista Home premium then you have missed out on the pleasure of accessing your local group policy. Of course they are other ways to change settings that usually were in group policy, however they are all labour intensive.

I have nothing against Vista, however why downgrade a feature that was readily available in the last few additions of Windows XP. Unfortunely if you are a group policy junkie like me, you will just have to upgrade to the next Windows Vista edition that does allow access to gpedit.msc.

How to zip and unzip files and folders in Windows Vista

In Windows vista you can simply double click on a zipped file or folder to see the contents and if you wish to extract the contents you can. All you have to do is press on extract from the top menu.

With Window vista you do not need to install an extra program to unzip a file.

DVDs and information about the teacher at http://www.alaskafilmstudios.com/cotu.html

Three basic Windows Vista tips and tricks video tutorial

This video tutorial covers the three main basic tips for Windows Vista.

Basic tips and tricks included in this video tutorial:

  1. Turn off the user account control
  2. Customize your start menu to a classic style
  3. How to customize the Windows Vista gadget siderbar

About the Author: DVDs and information about the teacher at http://www.alaskafilmstudio.com
I show you three tips in this tutorial to help you with Vista. Beginner’s level tutorial.

Choose which user account you want to login to automatically when Starting Windows Vista..

No one wants to enter thier username or password in everyitme they want to use the computer. Especially if it is a home computer that has not got important information to protect. Logging in to your user account atromatically is a lazy persons dream, however it also makes it easy for anyone to login to your computer. This removes your password protection, so when the computer is turned on it goes straight inot the user account that it was programmed to open.

How to set an account to open automatiacally:

  1. In Windows Vista fo to the start menu.
  2. Choose run from the menu or go to the search bar at the botton.
  3. Type in control userpasswords2 and press enter.
  4. The User Accounts window will appear. (screenshot below)
  5. Now select a user name by making it blue.
  6. Remove the tick in the box next to Users must enter a user name and password to use this computer.
  7. Press apply. You will be asked to enter the password for this account. If there is no password then leave it blank.
  8. Press ok and exit.
  9. Restart your computer and it will login to that account automatically.
  10. If you wish to change the account to login to then return and selct the user account that is on automatic, tick the box again, then start from scratch to change the settings to another account.

Login to your user account automatically

Login to your user account automatically

  • There can only be one account to login to at any one time. You must turn it off to turn another account on.

Change the volume of individual programs in Windows Vista

Sometimes a cool feature can be staring you in the face. However if you are an explorer like me then you would have already realised that in Windows Vista there is a new enhanced volume control mixer.

Where is the Windows Vista Volume control?

The volume icon is usually in the notification area in the task bar in the right hand corner of your screen.
How to show the volume control icon in the notification area on the taskbar:

If it is not there see how to Add or remove icons from your Windows Vista notification area This article will help you bring back the volume control icon.

How to change the volume on each individual program in Windows Vista:

All you have to do is click the volume icon in your system tray, and then click on the word Mixer at the bottom. Then you will see your different programs listed each with a different volume control.

Watch this video tutorial on how to change the volume of individual programs in Windows Vista.


How to make your Windows mail email into a webpage with links and pictures

There are many benefits to writing an email in rich html format in Windows Mail or Outlook Express. One of the main benefits would be that you can insert links to websites. Another great fact is that you can also insert a picture into your email so the person receiving the email sees the picture straight away. Writing an email in HTML rich text format also can make your email look like a professional webpage.

How to make your Windows mail email into a webpage with links and pictures

  1. Open Windows Mail
  2. Click on the create mail icon at the top
  3. Got to the format menu and choose rich text HTML from the menu
  4. Now a HTML editor tool bar will appear just above where you will write the content of your email.

How to insert a link into your email?

You can make your text into a html link. So therefore you can link to a website and user anchor text. For example you can make this Tips4pc link to the Tips4pc website, instead of having this ugly link http://www.tips4pc.com

  1. Select the text in the content of your email by making it blue.
  2. Then press on Create a hyperlink icon in the HTML toolbar.

How to insert a picture from your hard drive or one stored on the internet?

Not only can you insert pictures from your hard drive but you can also insert pictures and graphics that are stored on the internet. Just simply go to the picture you want in your email. Right click on it and choose properties. Then copy the url of the picture. So when you need to say where the picture is stored, you can paste that url in and the picture will appear in your email.

  1. Click on the insert picture icon.
  2. To insert a picture from your computer click on browse to find a picture on your hard drive.
  3. To insert a picture that is stored on the internet paste the url into where it says location.

windows vista tips

Windows vista tip for network troubleshooting

Unidentified Network
Windows Vista can sometimes cause network adapters to show up as connected to an "Unidentified Network", sometimes limiting the network to local access only.


There are many reasons that can cause this problem, but some suggested solutions to try are:
• Reset your Router using the web control panel.
• Update your network adapter drivers.
• Temporary disable any Anti-Virus/Firewall package to see if the problem is resolved.
• Try assigning a static IP address to the network card.
• Disable IPv6 on old network cards / routers.

These suggestions may help you narrow down the cause of the "unidentified network" problem.
troubleshooting computer network is among the most important job descriptions of the network administrators, system administrators, network technicians and the IT consultants. A computer network can have different kinds of problems such as it can be infected with virus and spyware, attacked by hackers, accessed by unauthorized users and may face connectivity failure issues due to the faulty network devices or configurations. Following is a list of the basic network troubleshooting commands that are built-in the Windows based operating systems and UNIX etc. The right use of these troubleshooting commands can helps a lot in diagnosing and resolving the issues with your computer network. few more windows vista tips.
PING
Ping is the most important troubleshooting command and it checks the connectivity with the other computers. For example your system’s IP address is 10.10.10.10 and your network servers’ IP address is 10.10.10.1 and you can check the connectivity with the server by using the Ping command in following format.
At DOS prompt type Ping 10.10.10.1 and press enter
If you get the reply from the server then the connectivity is ok and if you get the error message like this “Request time out” this means the there is some problem in the connectivity with the server.
IPCONFIG
IPconfig is another important command in Windows. It shows the IP address of the computer and also it shows the DNS, DHCP, Gateway addresses of the network and subnet mask.
At DOS prompt type ipconfig and press enter to see the IP address of your computer.
At DOS prompt type inconfig/all and press enter to see the detailed information.
NSLOOKUP
NSLOOKUP is a TCP/IP based command and it checks domain name aliases, DNS records, operating system information by sending query to the Internet Domain Name Servers. You can resolve the errors with the DNS of your network server
HOSTNAME
Hostname command shows you the computer name.
At DOS prompt type Hostname and press enter
NETSTAT
NETSTAT utility shows the protocols statistics and the current established TCP/IP connections in the computer.
NBTSTAT
NBTSTAT helps to troubleshoot the NETBIOS name resolutions problems.
ARP
ARP displays and modifies IP to Physical address translation table that is used by the ARP protocols.
FINGER
Finger command is used to retrieve the information about a user on a network.
TRACERT
Tracert command is used to determine the path of the remote system. This tool also provides the number of hops and the IP address of each hop. For example if you want to see that how many hops (routers) are involved to reach any URL and what’s the IP address of each hop then use the following command.
At command prompt type tracert www.yahoo.com you will see a list of all the hops and their IP addresses.
TRACEROUTE
Traceroute is a very useful network debugging command and it is used in locating the server that is slowing down the transmission on the internet and it also shows the route between the two systems
ROUTE
Route command allows you to make manual entries in the routing table.
Hopefully the above mentioned commands will help you to diagnose the troubleshooting your computer networking problems

Vista guide for Disk utility

Vista guide how to use disk utility

In windows vista there is a disk utility which checks your hard disk for error, bad sectors and recover information. You can troubleshoot your hard disk in windows vista. this is useful vista guide to check your hard disk.

In order to check a disk in Windows Vista, go to my computer and select the drive you want to check right-click on the disk and choose Properties as shown in below snap.

On the Properties page, click the Tools tab and click Check Now.


Select the options automatically fix file system error and Scan for and attempt recovery of bad sectors checkboxes and click Start.


You cannot check the disk while it is in use. Windows vista perform disk check when in restart by choosing Schedule disk check.


Upon restart, you will see following screen which indicate that disk is checked for errors and repaired if needed.